Remember that crazy good bargain of a
sewing machine that I got at a yard sale? It works like a dream. The best $7 I ever spent. So it's been sitting out...ahem, on the dining room table where I accomplish my sewing projects, and when it's not in use it tends to collect dust. Okay, so everything is pretty much dusty in here but I thought if I made a cover for it at least that would keep it clean and it would look cute. I found a few tutorials out there but they were for more of a flap cover with Velcro straps around the sides. Don't get me wrong, they were cute and simple to make but with small kids and a cat and, ya know, dust I wanted to cover the whole shebang so I could put the pedal and cord in there, too and have it all nice and tidy. So I decided to make my own cover, but then I thought it should be reversible because I like choices. I went through my stash and in one nap time I had it done.
You'll need two fabrics--fabric A and fabric B, interfacing (if you want it), a measuring tape, scissors or rotary cutter, some pins, a pencil or water erasable pen, and a little time with no distractions OR a lot of time if you have small ones that are awake and demand your attention. :o) (For this whole project I used a 5/8" seam allowance)
Step ONE:: Measure your sewing machine from the center of one side to the center of the other side. (mine measured 21 1/2 inches)
 Step TWO
:: measure your sewing machine from front to back over the tallest part (mine measured 26 inches
 Step THREE
:: Add one inch to each measurement then cut out both fabrics and one interfacing. (I cut my fabric to be 22 1/2 " x 27") It's a bummer that a fat quarter won't work, but it is a good stash buster project.
 Step FOUR
:: If you're going to use interfacing now is the time to iron it to the wrong side of fabric A. If you choose not to use interfacing then go to step five.
Step FIVE:: Fold fabric A in half with right side sides together (my folded fabric was 22 1/2" x 13 1/3") and sew down the two sides. Repeat for fabric B.
Step SIX:: Using a ruler and water soluble marker, measure a 2 1/2" square from the seam to the top edge of the fabric on both corners of both fabric A and fabric B. (The widest part of my machine is about 5 inches but if yours is narrower then make your square to cut out a little smaller.) Cut out the square.
 Step SEVEN
:: Pinch seams together and pin. Go ahead and do all four corners then sew each one. Doing this will create the box corners that you'll need.
 Step EIGHT
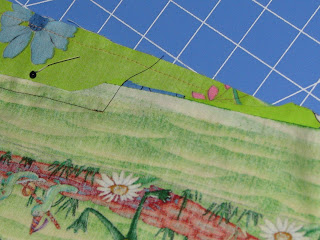
:: Open up fabric A so that the wrong side is facing out (with the boxed corners and interfacing it should stand up) then open up fabric B so the right side is facing out and place it inside of fabric A. (so now, the right sides are together) Line up the side seams and pin all the way around making sure to leave a 4" space for turning at the end. Don't worry, that gap will get sewn in the top stitching.
Step NINE:: Sew around the entire edge...but leave open that 4" space.
 Step TEN
:: Okay, now for the turning. Reach into that 4" opening and pull fabric A through which will in turn pull fabric B so that both right sides are showing. Now tuck fabric B back down into fabric A and line up the corners. Press all seams and be sure to press the seam allowance of that 4" opening so that it's even with the rest of the seam.
Step ELEVEN:: Top stitch around the entire edge being sure to catch the seam allowance of that opening...and viola! You're done!
Here's my cover...side A.

And the reverse...side B. Does that fabric look
familiar? My cat seems to like it.

I did not use interfacing. But if I make another cover I will so that it will have a more firm look to it. Of course, you could use this tutorial to make a cover for other things too...just measure twice and cut once.


